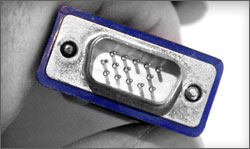
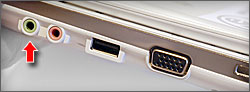
Your VGA cable has a connector like
this at both ends.
You'll need:
- a data projector (and power cable).
- a computer (and power cable if your laptop's battery isn't already charged).
- a 'VGA' cable. (See the image on the right.)
- an internet connection, if you plan to work with internet content.
Your computer most likely has a wireless 'card' – a kind of receiver – which should automatically pick up the internet connection in your school. (That signal is emitted by a wireless 'router' somewhere else in your school building.)
How do I know if my computer is connected to the internet in my school?
- Just launch your browser*. If your computer finds an internet connection, a 'live' internet page will be displayed.
If a message like 'You are not connected to the internet' is displayed, you'll need to make a connection manually. (You'll need to ask someone in charge of IT in your school how to do this. It's easy, but you'll need to find out the 'name' of the connection you must tell your computer to make, which varies from school to school.)
*We like Firefox, Safari, Google Chrome, and Opera browsers, all of which are free downloads.
Next:
- Connect one end of the VGA cable to your computer's VGA 'port'.
- Connect the other end of the VGA cable to your projector. The connections are like this:
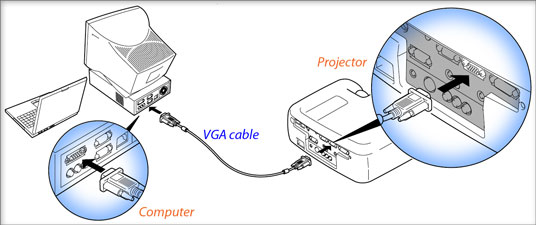
(If your projector is installed in the roof of your classroom, you only need to connect the 'loose' end of the projector's VGA cable to your computer.) - Turn on the projector.
- Turn on the laptop.
Your projector should automatically sense that a computer is connected and should display content on the wall. If this doesn't happen automatically – and a 'blue box' continues to be displayed on the wall, locate the 'Input' (or 'Source') button on the top of the projector (or on the projector's remote control).
Press this button until 'Computer' is displayed on the wall. Then WAIT for a few seconds until content is displayed on the wall. - Ensure that the projected image is squared up.
Use the 'keystone' buttons on the projector (or on the remote control) to make adjustments, if necessary. - Focus the projected image.
Manually turn the focusing ring at the front of the projector lens, or use the remote's focusing buttons, to ensure that the projected image is sharp.)
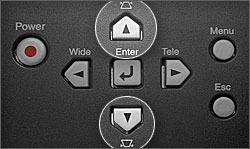
Use the 'keystone' buttons to square
up the projected image.
Use the projector's focusing ring (at the front of the lens) to make sure the image is sharp.
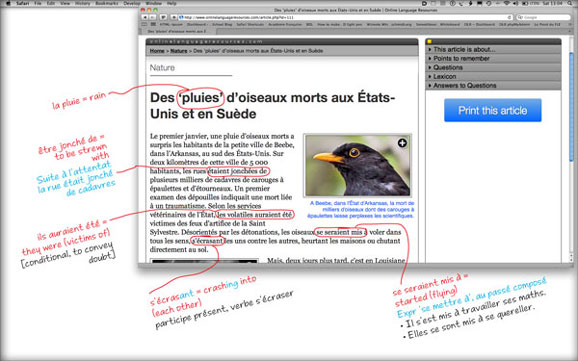
- Resize your browser window so that it takes up roughly the amount of space shown in the image below.
(Click-drag the right-hand edge of the browser window to pull it inwards or outwards. Click-drag the bottom edge to pull it upwards or downwards.) - Change your desktop to white.
Consider projecting onto a regular whiteboard rather than a dedicated projection screen. Projecting onto a regular whiteboard screen will allow you to write 'notes' on the desktop – with regular whiteboard markers – outside the browser window, like this:
There will be times when you'll want your students' full attention, without having them continue looking at content you are projecting on the wall.
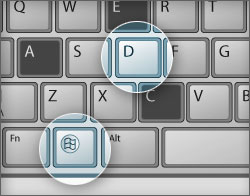
To temporarily hide all windows on your desktop, press and hold the 'Windows' key; then press the 'D' key.
To make the window or windows reappear, press the same key combination again.
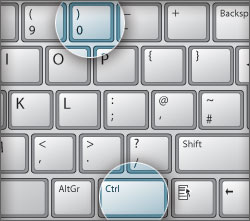
Pressing the Ctrl key and + (plus),
- (minus) or 0 (zero) to change the size
of what you're viewing on a site.
You may find occasionally that things need to be resized. Maybe the text on a site you're visiting is very small, or perhaps one or two of your students simply find it difficult to see clearly.
Press Ctrl and + (plus), - (minus) or 0 (zero) to change the size, as follows:
- Press Ctrl-+ to increase the size of browser content.
- Press Ctrl-- to decrease the size of browser content.
- Press Ctrl-0 to revert to the default size on the site you're visiting.
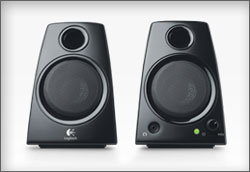
Generally speaking, your computer's speakers will be inadequate for audio playback in your classroom.
As for your projector, it too has an in-built speaker but more than likely it will be inadequate for classroom use.
You can buy very reasonably-priced speakers here, from Logitech, a company that specialises in computer periperhals.
Connect the 'jack' plug from
your external speakers to
your computer's audio port.
External speakers have their own power cable and a separate, thinner cable with a 'jack' on the end which plugs into the 'audio port' on your computer.
When you connect external speakers, you computer should detect the connection and play back through the external speakers, rather than through the in-built computer speakers.
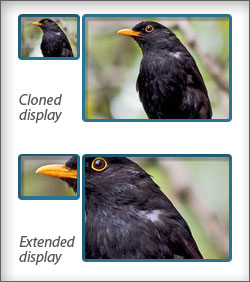
There will be times when you will want have different content on your laptop and in the projected image.
By default, when you connect a data projector to your laptop, the projector shows a duplicate of your laptop screen. That is, a 'copy' of what is on your laptop screen is also shown by the projector.
However, if you wish, you can choose an extended display, where your laptop image is just part of a bigger image, most of which is projected onto the wall. (See the graphic on the right.)
To alternate between the 'duplicate' and 'extend' options:
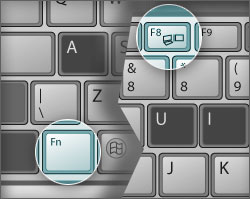
- Locate the display configuration key on your keyboard.
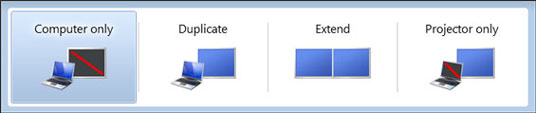
(The configuration key is one of the 'function' keys, but varies from computer to computer. It will have a small icon showing miniature computer displays.) - Press the screen configuration key to cycle through the possible display configurations ('computer only, 'duplicate', 'extend', 'projector only').
(To use this key, you will need to press the Fn key along with the relevant function key on your keyboard to bring up the display options.):
When you have selected either the duplicate or extend option, it will take several seconds for the displays to reconfigure. The projected image may go 'blank' for a few moments: this is normal.

The following sites may prove useful to you when preparing content for your classes:
- For news…
- For info on grammar, tenses, spelling, etc…
- For info from the FTA…
- For examples of two great blogs (see no. 8, below, for more info about 'blogging')…

Setting up a blog via Wordpress.com or Blogger.com is an easy way of posting your own content on the internet.
It is very feasible to put your own – or your department's – content on the internet. Why would you do this? There are several reasons:
- to make your notes accessible to students at any time
- to let your students know what they should revise for exams
- to put useful links for your students in one place
- to post homework for your students
- to show video content (from sites like YouTube (which may be inaccessible in your school))
- to summarise content that some of your students have missed (when out on work experience, out sick, etc)
- to encourage student participation
- to 'show off' students' work
Your blog doesn't have to be available to the public.
To set up a blog
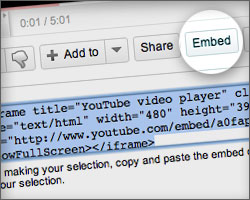
YouTube is off limits in many schools. But you can paste a YouTube video's 'Embed' code into your blog so that the video clip is available via your own blog.
You can set up a blog very easily using a service like Blogger or Wordpress.
When your blog is set up, you can post whatever content you wish: text, audio and/or video.
- To add video to your blog…
- … for example of a school trip to Paris, a French play in school, students' artwork, etc), you can…
- upload your video to YouTube, and then
- copy and paste your video's embed code into your blog
- … for example of a school trip to Paris, a French play in school, students' artwork, etc), you can…
- To add audio clips to your blog…
- If you have a Wordpress blog, you can post audio clips (mp3 files), for example an interview in French, a piece of music, etc.
To upload audio, however, you must purchase a 'Space upgrade' to your Wordpress account. (Wordpress space upgrades start at just under $20.00 dollars per year.)
- If you have a Wordpress blog, you can post audio clips (mp3 files), for example an interview in French, a piece of music, etc.
Making a podcast
A podcast – like our own one at Learn French by Podcast – allows you to 'broadcast' audio (or video) episodes regularly.
You could even consider making a podcast, that is making a series of audio 'episodes' – on whatever topic – available to your students. The cost is almost negligeable and companies like Libsyn make it very simple.
(A podcast allows people to listen to discussions, interviews, music from a concert, etc, at time of their own choosing after the podcast episode has been 'posted'.
Most podcast producers record audio and save it as 'mp3' files which can then be made available via Apple's iTunes service, etc.)
We have our own very popular podcast and accompanying website at Learn French by Podcast.
NOTE: anywhere the Ctrl or Shift keys are mentioned below, you can use the left-hand or right-hand keys. For simplicity, only the left-hand keys are mentioned in the examples below.
(The steps below will allow you to type accented characters in most computer programs. Some programs, however, may require that the US-International keyboard layout is selected and that the keyboard input is set to 'US-English'.
(These settings can be accessed via keyboard and input settings in your Windows Control Panel.))
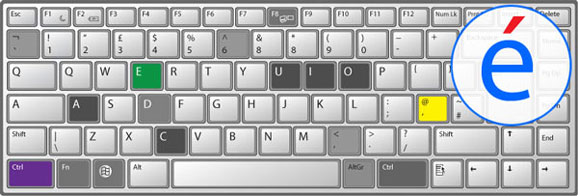
To type an accent aigu:
- Press and hold down the Ctrl key
- Now press and release the apostrophe key
- Now release the Ctrl key
- Lastly, type the letter e on its own (or whatever other vowel is appropriate)
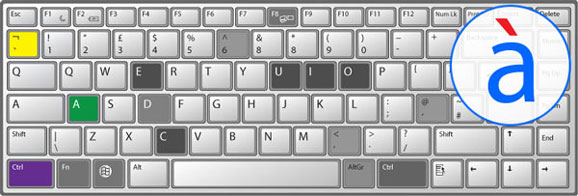
To type an accent grave:
- Press and hold down the Ctrl key
- Now press and release the grave key
- Now release the Ctrl key
- Lastly, type the letter a on its own (or whatever other vowel is appropriate)
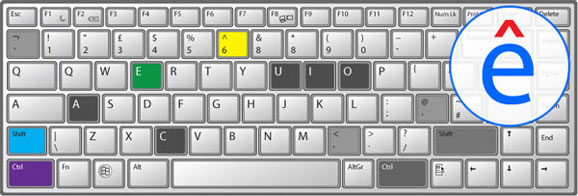
To type an accent circonflexe:
- Press and hold down the Ctrl and Shift keys together
- Now press and release the number 6
- Now release the Ctrl and Shift keys
- Lastly, type the letter e on its own (or whatever other vowel is appropriate)
To type a tréma:
- Press and hold down the Ctrl key
- Now press and release the colon key
- Now release the Ctrl key
- Lastly, type the letter e on its own (or whatever other vowel is appropriate)

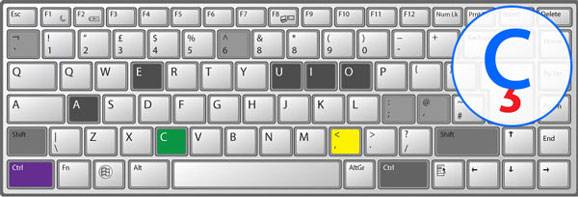
To type a c-cédille:
- Press and hold down the Ctrl key
- Now press and release the comma key
- Now release the Ctrl key
- Lastly, type the letter c
Given the wide variety of data projectors and computer operating systems, your own classroom setup may vary slightly from what we have discussed above. Consequently, you may require clarification of some of the points above in which case you may wish to contact us.